Monday, May 2, 2016

Dave's Drives: Central California Coast in McLaren 12C

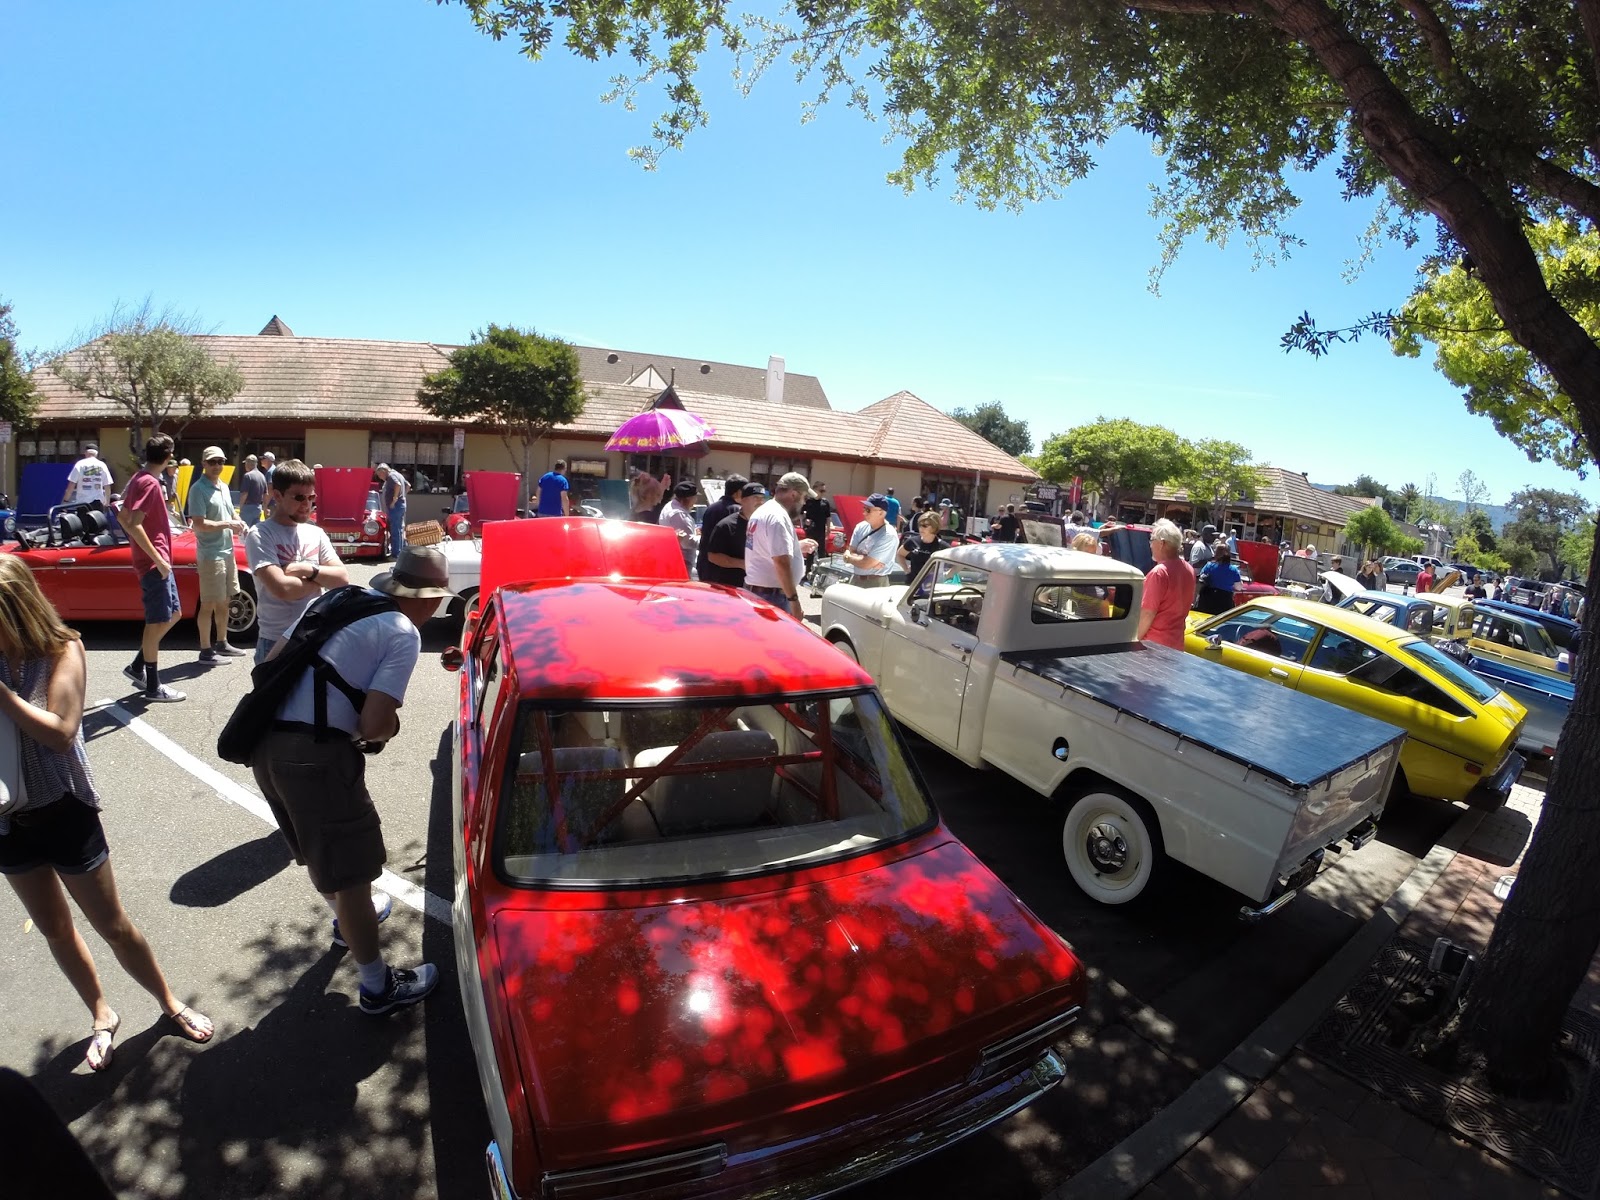
This year, I decided I wanted to attend the Annual Datsun Roadster Classic in Solvang California.  This annual event brings Datsun Roadster enthusiasts from all over to a small town in California known for its Danish bakeries and its feel of being in Copenhagen (or maybe a Disney-ish version of Copenhagen).

So my wife and I decided to make a road trip out of it, and although I wanted to bring my 1968 Datsun 2000 Roadster, that would limit the number of days we'd be willing to be on the road (6 days with no heat or A/C wasn't going to cut it this time around).  So we decided there would be enough Datsuns on display without ours, and we'd take the 2012 McLaren MP4-12C on a run through wine country and on to the Coastal treasures near Solvang.  Our loose itinerary shaped up like this:

Paso Robles for wine tasting
Pismo Beach for dune buggy adventure
Los Olivos for more wine tasting
Solvang for the Datsun show
Buellton for the Mendelhall auto/petrol station museum as part often Datsun gathering
Santa Barbara for more beach and good food

Even after 53 years of living in and exploring California,  I am always amazed at discovering new things I had missed in this great state. The Central Coast (basically the area between Monterey and Santa Barbara, including the inland valleys nearby) is an area you could spend week or months exploring, and I found myself wanting more and promising myself another trip soon.

So, here is a pictorial review...

Paso Robles wine country. First top: Halter Ranch Winery, which has a spectacular new tasting room, albeit across a bridge and a somewhat muddy driveway!  That's OK, as kids I used to know would say:"dirt don't hurt"


Next Stops were Justin Winery and Tablas Creek.  Wonderful people, fantastic wines of the region! Trying to find shade to park in to keep the wines from cooking in the car was a challenge!


We booked a room for the evening at the CaliPaso Winery Inn, peaceful spot in Paso Robles, a town we could have spent much more time exploring.  The roads are fun to drive: Adelaide Road, Chimney Rock Rd, and Highway 46 all provide twisty fun, rolling hills, wine growing scenery.  Highway 101 through the Paso Robles area is attractive as well, with the greenest part of the year in those rolling hills in March and April:


We did manage to sample the local beer at the Taproom, aka the brewpub at Firestone Walker  Brewing Company in Paso Robles.  Tasty beer:


The next day was a short ride over to Pismo Beach.  We went the direct route, but I suggest Highway 46 to the Coast to take part of Hwy 1 from Cambria through Morro Bay.  Of course, if you come down this way from Monterey and Big Sur, even better!! Along our inland route, we should have spent time in the terrific town of San Luis Obispo, but we were too excited to get to the coast! The weather was perfect and we loved the hotel (Inn at the Cove, Pismo Beach), and the views from our balcony!


We explored the little beachside town of Pismo Beach, which is growing like crazy with a large new hotel, but which still has a terrific surf shop, covered with vintage surfboards and skateboards (many of those skate decks were part of my mis-spent youth!). Make sure you stop into Pancho's Surf Shop if you're ever down here!  Nice people, I just had to buy something!!


We then moved on to our day's destination: Sunbuggie Rentals (again, more nice people!), so we could experience the wide open spaces of Oceano Dunes State Vehicle Recreation Area. the rookie buggies aren't super fast, but you can upgrade if you want.  Either way, this is a blast and should be on your bucket list.  The sand dunes go on for miles!! 


We ate at the beautiful Ventana Grill in Pismo Beach (try the blackened scallops and the Coconut Mojito!) and enjoyed the sunset, then woke the next morning to a postcard-worthy day for a walk on Shell Beach, the northern part of town:


We made our way to Solvang, CA, with a  stop in Buellton (home of the Famous Andersen's Pea Soup), where the Datsun crowd was starting the festivities at the Mendenhall Museum of Automobilia:


The next day was the Datsun Roadster event, which brought out many great cars from all over the country, some very stock cars and some very modified.  All beautiful!


The town of Solvang is known for it's danish bakeries.  For good reason... lots of butter and sugar!


We spent time in Los Olivos, doing more wine tasting and having excellent food.  Try this town out, charming is the word...


The next day we headed to our final destination, Santa Barbara.  You could spend a week right here enjoying the downtown, the up and coming restaurants in the "Funk Zone", and the many beaches.  We stopped in at the historic Mission Santa Barbara, and the McLaren 12C was right at home on the beach with other fun vehicles.


And then a 4.5 hour drive back home to the SF Bay Area. We started making plans to come back again soon, and I started to clean the bug collection from the front of the Mac. The Central California Coast is a real treasure chest of great things to do and see.  Next time I think I'll definitely take a convertible!!


Tuesday, March 29, 2016

Porsche Cayman S Brake update: DIY rebuilding Girodisc brake rotors

I'm writing this post because I couldn't find anywhere on the web that had a step-by-step discussion of doing this task...hopefully someone finds this helpful.

A few years ago, I performed an upgrade to the stock brake set-up on my 2007 Porsche Cayman S, utilizing aftermarket rotors from Girodisc and race-oriented pads from Pagid.  I wrote about it in this prior blog post:

brake-upgrade-for-cayman-s


I have been extremely happy with the amazing performance of the brake set-up and also with the longevity of the rotors, which have lasted my several seasons of track days (about 10-12 track days per year). So when the rotors got down to minimum width specs and it was time to replace them, I had no doubt I would again use Girodisc rotors which are slightly larger than the stock rotors, seem to dissipate heat more readily, and don't have cracking problems when used in high-temperature, hard-braking track conditions.

When I went to purchase new rotors, I was pleasantly surprised to realize that Girodisc developed their rotors so that the ring, or disc portion of the rotor can be replaced separately from the "hat" portion which attaches to the axle assembly and ultimately the wheel. What this meant was that instead of purchasing $2200 worth of new rotors ($1100 for each set of two), I could purchase only the ring/discs for $700 for a set of two, for $1400 total. That $800 difference was a nice surprise and represents almost the cost of a new set of tires!  So, I ordered the rings and started taking apart the old brakes to prepare to re-assemble the new ones. That is when I discovered that I couldn't find any online resources that showed me exactly how to complete the job, so I started taking some photos along the way to share with anyone else who might do this.

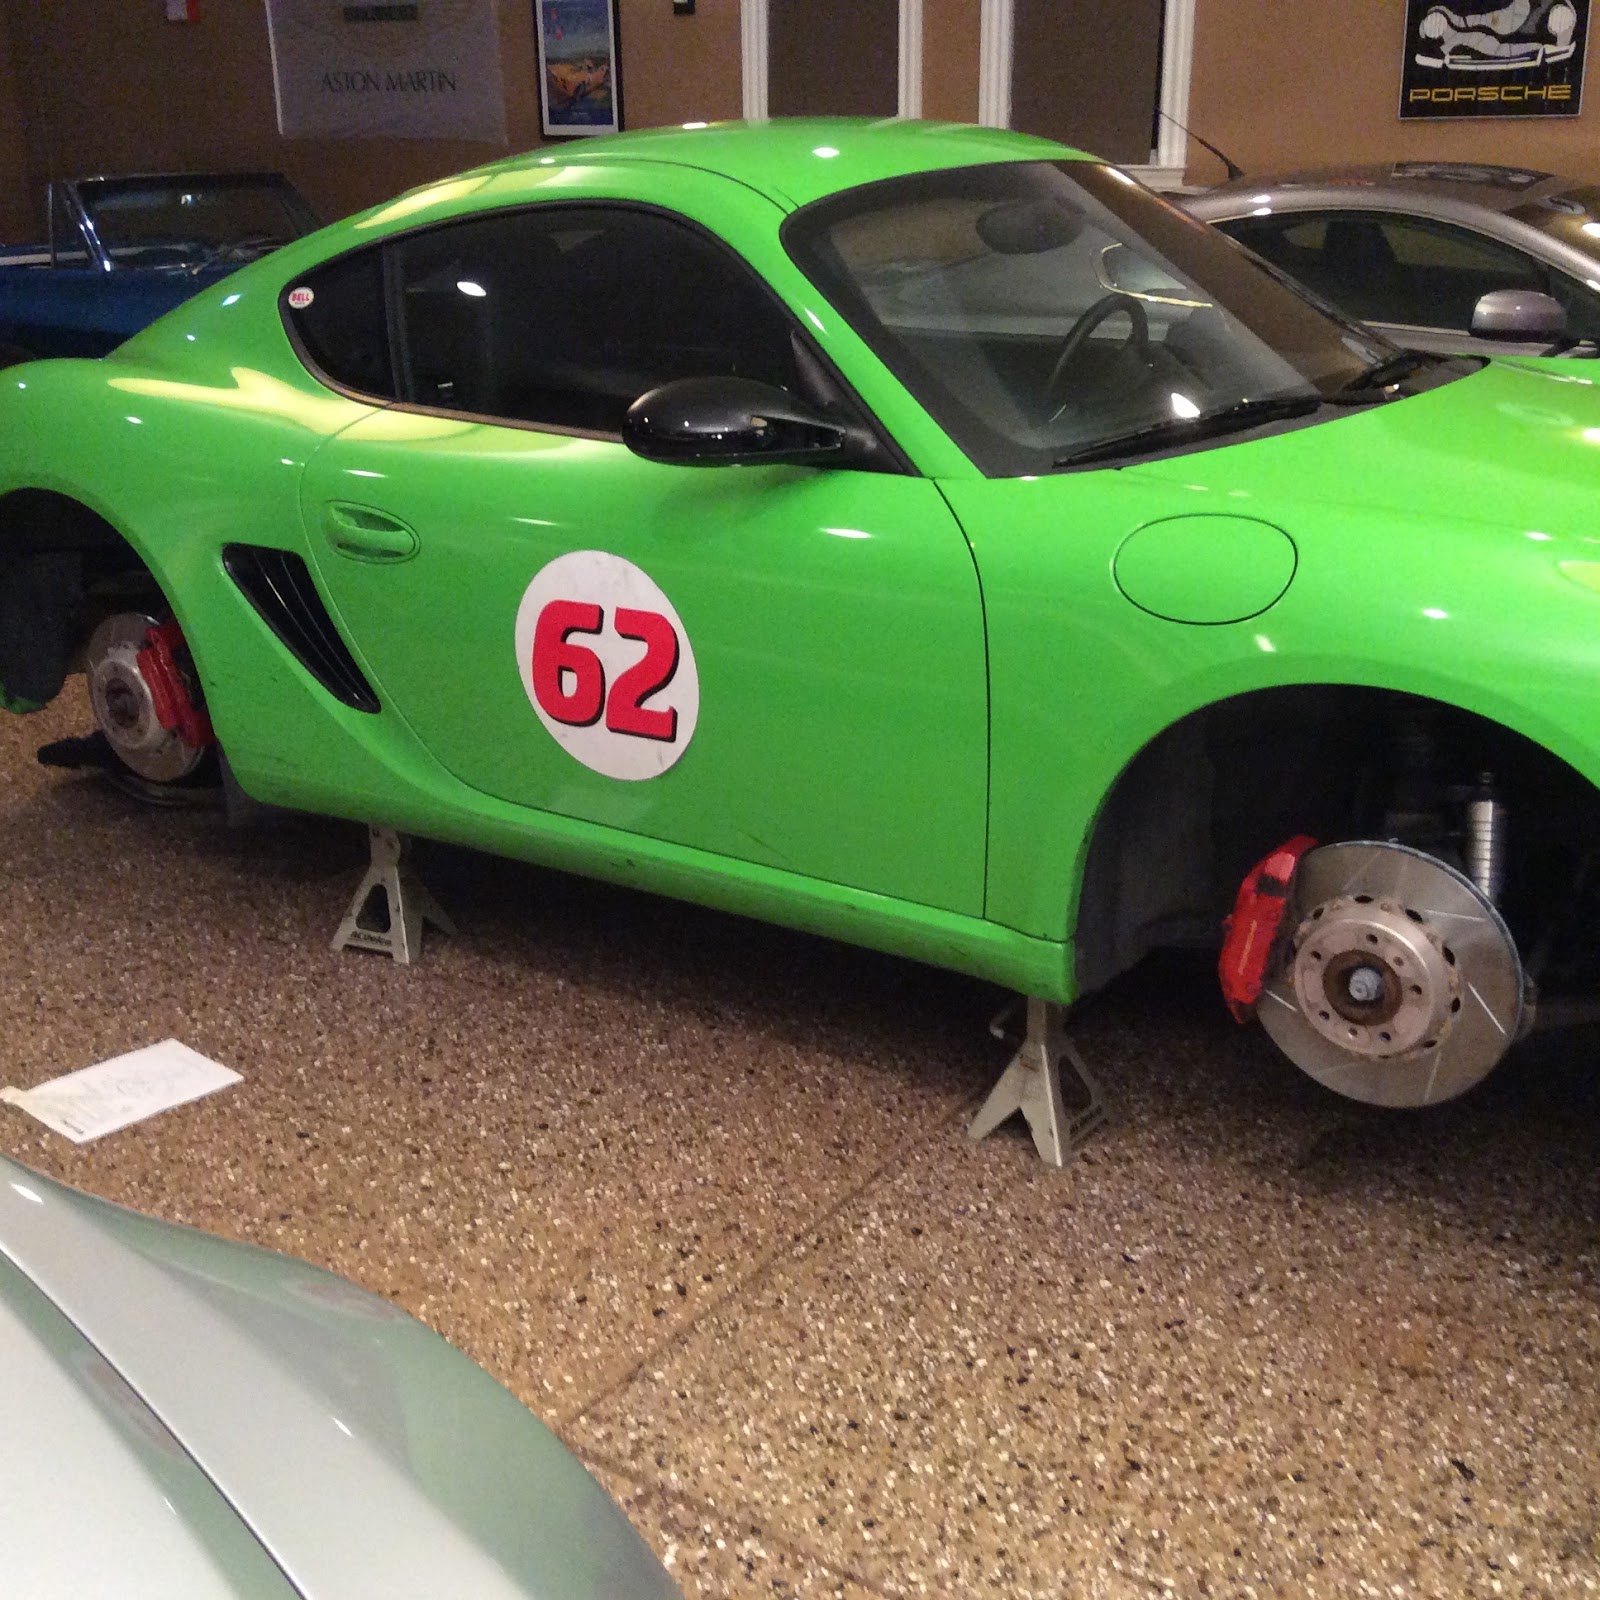
First steps were to get the car up on jack stands and remove the old brakes, then I set out the new front and rear rotor parts where they need to go (fronts and rear are different sizes and left and right are labeled from the vendor). Note that left and right are different to ensure the proper rotation of the rotor and the cooling grooves cut into the disc. See the Girodisc site for more info on that here:
girodisc.com/Technical-Info

If you have never removed your Cayman brakes, it is pretty simple (at least on the 987 version of the car in 2007). With wheels off, use pliers to remove the cotter pin that holds in the retaining pin in place over the brake pads, then tap the retaining pin out from the holes at the top of the brake pads, releasing them from the small tensioner plate and remove the pads with pliers.  You then remove to large bolts that hold the calipers to the axle using a T55 Torx drive socket. You then remove two small phillips head screws that hold the rotor to the axle and you can pull the rotors fully away from the axle and out of the caliper assembly. There are lots of web posts on this subject so I won't go into it any farther here. I always use some wire to then keep the calipers from dangling on their brake lines while the brakes are disassembled. It'll look something like this:


Now it was time to take the rotor "hats" off the rotor discs. This requires a 5/32 allen head wrench which will also need to be used with a  torque wrench for reassembly, so it is best to just find a ratchet-driven one now for taking it apart.


I started taking them part and found a few things to note.  First, the fronts were much tighter than the rears.  I can only assume this is because the fronts got much hotter during their life on the track and the bolts had gone through more expansion and contraction. I was surprised at how hard it was to get the bolts off the from the hat because I knew the torque settings to reassemble were only 5 ft-lbs (60 inch-pounds).


Once the 10 bolts have been removed from the inside of the hat, the hat should separate from the ring. But on the fronts, again, it didn't come away easily. The heat had them somewhat bonded, but by holding the hat I could smack the disc with a hammer to separate them. The next thing to get out were the drive bushings, which are the threaded "sleeves" that the bolts go into, the heads of which you see on the outside-facing part of the rotor.


Again, the front ones had a harder time coming out, so I used an old screwdriver as a center-punch to get them out. The rear ones came out just with with finger-power.


With the hats now removed, I used a wire brush on a drill to clean up any corrosion, and finished off with some brake-clean to make sure the hats would seat perfectly on the new rings and that the assembly would seat nicely to the axle. The people at Girodisc make sure to tell you that any burrs or inconsistencies on the contact surfaces can lead to vibration or diminished performance. The clean hats were now ready to go onto the new rings.


When I had previously read the specs for assembly, I had realized I needed a smaller torque wrench and could find one only online.  For settings as small as 5 ft-lbs, the wrench is a 1/4" drive.  So since the allen-head socket is a 3/8" drive, I also needed an adapter to allow a 3/8" socket to go on my new 1/4" drive torque wrench. the Girodisc ring set comes with all new hardware, so with shiny new stuff, I was ready to go.

The hardware kit includes 10 bolts and drive bushings for each rotor, with 5 of one type of bolt assembly and 5 of another. You assemble them using these two bolts in an alternating pattern around the hat. One type has an expansion piece/spacer that looks like "shoulders" on the bolt.  This sits against the hat surface and (I assume) allows for some expansion when the brakes get hot.


I first placed the brass-colored drive bushings into the hat, and found that I needed to clean up the inside circumference of the old front hats with a round file, just so the bushing went in smoothly.  Just a few filings and the hat holes were ready to accept the bushings.


I then placed the hat onto the new ring, lining up the bushings into the holes on the ring and then installed the ten bolts in alternating pattern.  I placed a couple drops of high-temperature thread locking fluid on each bolt. I don't have a photo there, because I didn't have three hands and I was holding the rotor assembly vertically.  I then placed the rotor down flat on the bench and torqued the bolts to 60 in-lbs.


With the rotors now each re-assembled, I just reversed the process and re-installed the rotors onto the car. Of course, now you have a slightly thicker rotor disc than the old used one so you may have to push the caliper piston-pots back to a more flat position against the inside of the caliper. I use the handle portion of a large 1/2' ratchet to lay against the inside surface and control slowly how much pressure to apply to make the pistons go back into the caliper. With the rotors back on the car, note the proper orientation of the rotor grooves relative to the direction of the car.


Now the "Gator" is ready to get the wheels back on and get to the track.  Thunderhill Raceway this week, Sonoma raceway two weeks later and Laguna Seca in about a month ! Ya gotta love Northern California track availability!

Good luck with your brake upgrade!!

Monday, January 11, 2016

The value of a 1967 Corvette Roadster vs a 2011 Corvette ZR1 Coupe in 25 years. Which one wins?

I have posed this question to a number of my car friends, so I am putting it here for everyone's consideration.

I currently own a 1967 ("C2") Corvette convertible with the 350HP 327cid small-block, a 4-speed manual transmission, Marina Blue exterior and White/Blue interior with White top. It is in excellent condition, with a complete nuts-and-bolts restoration having been completed in 2008 (I bought the car after that, in 2009).  In today's market, I'd say the car is worth approximately $60,000 - $65,000.


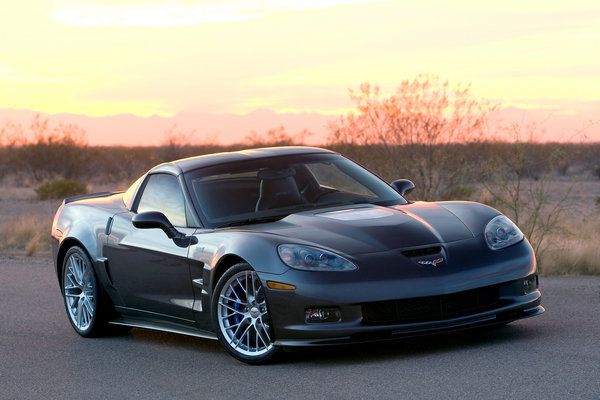
Meanwhile, a used 2009-2013 era ("C6") Corvette ZR1 goes for about the same price or a bit more, around $70,000. Keep in mind, this was a car that sold for over $110,000 new and was the flagship supercar for GM during the period before the newer C7 Corvette Z06 came into being. This was a no-holds-barred shot by Corvette at all the world's top performance brands and it was a pivotal point in Chevrolet's strategy to really bring the best of automotive technology to the Corvette, which was seen as a bit "plastic" and cheap compared to some rival supercars. It ushered in the next wave of upgrades which became more standard on the redesigned "C7" Corvette Stingray in 2014.


I have considered selling my 1967 and purchasing a C6 ZR1, possibly a 2011 model, assuming it would be close to an even trade in value. I could keep both, but space becomes a little tighter if I do.

So the question is this: in 25 years, which will be worth more?

Arguments for the 1967: the 1967 Vette is a classic sports car, the best in the U.S. in it's time. It may always be seen as a hallmark of design and performance for that era. Muscle cars from the 60's will always have a strong following because they are of an iconic age that will always be important and because they are easy to maintain, relative to the complex machinery of today. The design if the 1967, as the last of the mid-year Corvette C2s, remains as beautiful today as it was then.  Everyone who sees the car loves it, just as they do iconic cars like a 1961 Jaguar E-type convertible.

Arguments against the 1967: The buyers for those cars have typically been men who lived in that era and who have the disposable income in their 50's and 60's today to go back and collect that dream car from their youth. In 30 more years, those buyers are dead or out of their car buying period. The most collectable cars will always be the big-block 427s, and this car I have is a nicely optioned small-block, but there are too many of them that have now been restored relative to the number of buyers.  Every car auction seems to have an endless supply of C2 Corvettes for sale, and eventually the market will have been satisfied. If we look at the market for cars from the 1940's and 1950's, maybe there is a lesson there for the 1960's cars. Just a couple examples would be the 1953 Packard Caribbean or the 1955 Chevry Bel Air.  Both were considered highly desirable as collector cars, but in the last 5 years values have been flat to down. The people who lusted after them are just no longer driving the market.  About all they seem to benefit from now is general inflation. This is just my opinion and I would love to be proven wrong here. Highly specialized cars from the 1950's still do well (Ferrari, Aston Martin, Continental Mark II, early Corvettes), but I can't necessarily claim that my 1967 327 convertible fits that description.

Arguments for the 2011 ZR1: In 25 years, this car will likely be desired by those in their 50's that lusted after this car as a 20-year-old today when it came out in 2011. Note that there were just over 4600 ZR1s built during the 5-year production run, with about 400 built each of the last two years 2012 and 2013, so those are the more rare years.  People in 25 years may pay a premium for a nice example that hasn't been thrashed or tracked, something that will likely happen to many ZR1s today, because they have been pushed aside by the newer, shinier C7 Z06. The ZR1 is a limited production car, and although GM probably over-produced them for the current market, there will probably be more buyers than sellers in 25 years. Also by then, cars may be dominated by EV drivetrains, hybrids, or other alternates. Manual transmissions will be a thing of the past. Everything will be turbocharged for better fuel efficiency. And the next ZR1 in 2017 is rumored to be (gasp!) a mid-engined car!  So the 2011 ZR1 could represent the "pinnacle" of this second muscle era of the early 21st century. This type of naturally-aspirated V-8 with 638HP from an internal combustion engine will be like a long-forgotten dinosaur that may be worth much more money due to their place in auto history. 

Arguments against the 2011 ZR1: The 2011 car is a complex piece of technology that is not as easy to maintain as the 1967 and parts availability is unknown today. Repair and parts may become more expensive than the older car. The design was not considered revolutionary, although the car's overall performance was. 

Of course, with inflation over 25 years, if an average sedan will cost you more than double today's prices (say, $100,000), then it will be easy for both these cars to increase in value.

So, which one will be worth more in 25 years?  I'm actually starting to believe the answer will be the 2011 ZR1, if for no other reason that my arguments for and against above seemed to weigh in that direction.  But maybe one single argument is just looking at the cars... I mean, who doesn't love the 1967? 


So, there are 5 possible scenarios.

A. The 1967 will be worth more than the 2011 ZR1
B. The 2011 ZR1 will be worth more than the 1967
C. They will both be worth less than they are today, so either one is a bad "investment"
D. They will both be worth more than today, but will be close in value to each other
E. Impossible to tell, it depends on inflation

That is the multiple choice question to which I can't quite figure out the answer.  Maybe I just need to go for a drive to clear my head...


Thursday, October 15, 2015

Dave's Drives: Cayman S, a couple laps at Sonoma Raceway vs Mustangs


Here is a video from in-car at a recent track day with Trackmasters Racing at Sonoma (Sears Point) Raceway. The Cayman S was running well, and I was doing OK on the lines (only slightly better than the Mustangs I was chase and passing). I think my braking points and turn-ins still need work here.  Can't blame the car, just the driver - but I ran a few 1:56 range laps that weren't bad.  I need to drop another 5 seconds off that time, though.  For some reason, my sound is not synched well in this video...