The McLaren MP4-12C is an amazing driver's vehicle. I've driven my 2012 all over California and loved every second. I've had it on track just a couple times, and it always impresses me. But I took it out for a few laps at Sonoma Raceway one day and I was getting very weird brake response. The brakes were not stopping with full power and were unsettling the car, dancing a bit left and right going into hard brake zones like Turn 7 and Turn 11. And if you've ever gone into Turn 11 at Sonoma at high speed, you know that the last thing you want is to feel unsure about the car's direction or stopping power. There's a pretty ominous wall in front of you as you approach at 120+ MPH.
I cut the day short at the track. Good thing, too. Taking off a wheel when I got home, I could see that the OEM brake rotors were more than a bit worn. More importantly, I could see that the pads had been wearing very unevenly... the top of the pad was thicker than the bottom, which meant the brake calipers were exerting uneven pressure. At least one of the caliper pistons was stuck or hindered. It was time for a complete brake overhaul. I called the dealership: estimate was $18,000. Holy cow. New brake calipers, new rotors, new pads, full system flush. I decided I could do it myself for well under $4000. The brake calipers were the most expensive part, so I contacted the manufacturer of the OEM calipers (AP Racing), and they said they could rebuild the calipers to factory spec for $160 each. I found that Girodisc makes rotors for the 12C for about $700 per wheel. Plus pads for a reasonable price. Yup, I could do it all myself for under $4K.
First thing to do was to get the car up on my Quickjack. This required the rail extenders because the jack points are spread fairly wide along the wheelbase. The extender rails for the quick jack also add height to the jack itself (because they are stacked on top of the base rail), so the jack was now too tall to slide under the car. So, to get the car high enough to slide the jacks under it, I drove it up onto 4 small blocks of 2x4 wood placed forward of each tire. Up she went another 1.5 inches and that allowed the QuickJack to slide under and place the rubber blocks at the proper jack points. I bought all my components but the first thing I needed to get done was to send the calipers to AC Racing via their US partner Essex Parts).
The MP4-12C brakes are pretty easy to work on. First step is to make sure you have turned OFF the electronic parking brake so that when you work on the rears, they won't be in park mode (more on this later). The parking brake automatically engages when you turn off the car. You have to go through steps so that the brake does not come on when you turn off the car. This is key, or you will will not be able to remove the rear rotors (unless you do what I did, which is to hack into the parking brake with a battery and a couple wire leads later.... not easy).
To remove the brake pads, you simply tap out the two retaining pins using a center punch. They are held in place by the spring clip, so it's easier if you take pressure off them by pushing inward on that flat metal retainer with the down arrow stamped in.
Once you remove the pins, you can use a caliper spreaders (or a large set of pliers and a soft cloth) to spread the pads and compressing the caliper pistons back into the rotor.
You can then gently work out the brake pad wear sensor which is held into its slot with a small pressure clip. Just work it back and forth to remove without breaking it. These can be re-used or can also be replaced, as I chose to do in this case.
With the rotors free of the pads, you an how use the proper Torx bit to remove the rotors.
Then it was time to remove the caliper itself, which is held on by two large bolts into the spindle. You have to disconnect the brake line, so have a catch can for fluid loss.
I removed the front calipers and prepared them to send to AP racing for rebuild. I was about to move to the rear but figured I'd put on the shiny new rotors from Girodisc on the front first. They are slightly larger in diameter (more surface area for heat dissipation) and, depending on your car and application, generally come with a spacer and longer single bolts to accommodate the larger diameter. Already looking better!
Now it was time to remove the rear rotors and calipers. Ah, but here is where I discovered my parking brake error. The parking brake was fully engaged. I had no way of removing the calipers if the parking brake is engaged. S&%T. The only way to disengage the parking brake is by first turning the car on (car must be running, not just be in accessory mode). But wait: I have disconnected the front brake lines and there is no pressure in the brake system. Damn. Which means the car will not let me start the engine (brake pedal myst be applied to hit the start button. No car start, no brake disengage. No good. Hmmm, I called myself a few choice names, most of which I deserved. Then I started to do some Google searching and I learned that you can zap the rear parking brake piston from a battery to engage and disengage.
So I removed the battery from another car and hooked it up to a couple wires I had with alligator clips at each end. On the backside of the parking brake caliper I found the small wiring harness that plugs in there. I removed that and saw two leads. Depending on how you hook up your negative and positive leads, the piston in the caliper will engage tighter or it will loosen up. I tested it by hooking the clips to the caliper leads, then hitting a quick tap on the battery terminal. I heard the electric parking brake make a noise and it presumably moved. The rotor didn't seem to be any looser, so I assumed I may be causing it to tighten. I switched the leads and did a couple test taps again. The rotor appeared to free up a bit so I surmised that I had the correct "direction". I tapped a couple more times lightly and noted my ability to now turn the rotor a bit. I tapped some more an the parking brake fully retracted. Yay! Crisis averted. Although this little detour added a couple hours and lots of stress and swearing to my brake job. I started to wonder if $18K wasn't such a bad deal?
With the parking brake pad removed I could now remove the rotors, pads and rear calipers (no need to remove the smaller parking brake caliper because it wasn't being rebuilt). I repeated the same process from the front and soon had all four new rotors installed.
Now it was just a waiting game while I mailed the calipers to AP Racing and waited for them to return. It took a bit, but eventually they came back, beautifully refurbished and ready to go. This alone saved me $9K in not having to buy new calipers from McLaren. AP painted them black again. I had considered a color change but thought I'd keep it stock. I sourced my own decals elsewhere to finalize the look.
Now it was just time to bleed the brakes. I put on my PowerBleeder, drained the old fluid out of the master cylinder with a turkey baster, filled the master back up with Motul 600 brake fluid, and started bleeding away. Easy stuff if you have a good 11mm box/open/line wrench and a bleeder hose and catch-container.
When it was all done, it felt pretty good! Once I started the car, the brakes came nicely up to pressure after a few brake pumps and I managed not to go flying out the back of the garage with no brakes. Happy car, happy owner. Ready for adventures again!
Given the amount of time I spend at track days, I figured it might make some sense to start doing some simulated racing to cut down on all the tires and brakes I go through. A friend mentioned that he could get me all spec'd out with a good rig set-up to do some serious training on a simulator and get better in the real world. A friend of his is an IndyCar driver and he clued me in to what he uses to train when he isn't on the real track. I figured I'd give it a shot. I'd used some smaller, less intricate driving equipment for car video games, etc. But as I looked further into the world of virtual racing in iRacing.com, I realized this was a whole different animal.
I did some research into iRacing and became pretty excited about trying new tracks, new cars and competing against skilled drivers from around the world. Keep in mind, this all started about September 2020, so there was also the issue of "sheltering in place" and many of my 2020 track days and races having been cancelled.
You'll have to check out iRacing for yourself, but suffice to say it is the most realistic racing simulation available to the common person and it has some very exciting racing going on. All from the comfort of your "rig" and with no risk of bodily harm (ok, maybe tennis elbow or carpal tunnel syndrome).
Components to build my simulation rig:
Gaming PC: MSI Aegis RS Tower, Intel i9 with NVIDIA graphics and 1TB SSD
TV Monitors: MSI Optic G27C2 27" curved monitors (3)
Structural rig: Heusinkveld Sim Rig GT with triple monitor mount and pedal base
Racing Seat: OMP Champ R
Racing wheel base: Simucube 2 Pro
Racing wheel: Cube Controls Formula CSX2 Carbon/Aluminum
Pedal set: Heusinkveld HE Pedals Ultimate
Shifter set: Hesinkveld HE Sequential Shifter
Yeah, it's probably overbuilt, but the direct-drive wheel base and high quality pedal set is what helps you really feel the car's feedback on track. The monitors are for more full immersion, and the gaming PC is necessary to render all the stuff that's going on in real time while racing 20-30 cars being piloted by people all over the world. Oh, and I plugged it directly into an Ethernet cable because WiFi just won't cut it when you need minimal latency in real time.
I was a bit daunted when the rig arrived, in all it's heavy-duty aluminum glory. The parts list was in the 1000's. Bolts, nuts, rails, corners, washers, etc. all had to be sorted out and arranged. I had to use my best "Rain Main" concentration skills just to get ready to start building. And build I did...
Unpack and connect the gaming computer...
Then it was time to put all that rigid aluminum together, one bolt at a time. This thing is really well engineered, like the metal baby love child of an Apple Mac and an Ikea shelving unit.
That took many hours, but now it's ready to start on the fun equipment. Starting with TV Monitors and the pedal set. I initially used the hardest rubber bushings on the brake pedal but later change do the softer green bushings for easier modulation of brake pressure.
Installing the triple-screen TV monitors isn't easy... there isn't just one axis / angle to set. There are a number of levels and angles you have to manage to get them lined up, properly hunkered up next to the adjacent monitor, etc. This part would have been aided by another set of hands holding things in place while turning wrenches on the nuts and bolts.
Next thing I needed to do was "cord management". Many zip ties and finding the most efficient routes from units to computer took some time as well. But the outcome was worth it.
Next ad last was the wheel hub (which controls everything) and the wheel and the seat.
And after some more heavy-duty cord management and a prodigious amount if zip ties.... she is ready for iRacing!! First stop, Laguna Seca Raceway!
Not long after I bought back into my memories with a 1999 Carrera 996 with the factory GT3 style Aero kit... I started to long for the real deal GT3. So...
Early this year, I bought a 2018 991.2 GT3 6-speed manual with 32K miles. Coming from Georgia to California. The car had been with the dealer for about 4 months, and it's a dealer I know on a personal level (the wonderful Jonathan Hull at Merit Partners), so I was comfortable doing the deal having never seen the car in person. Now that this back in the garage, a few of my friends are now forgiving me for selling the 2018 Mustang Shelby GT350R. That car was fantastic, but not quite the same level as the GT3.
The new car is silver, so that is a departure for me and my "Skittles" colors of the last few years, but this might cause the garage to get back to a more monochromatic stance. First, a few pictures, then the story of how it came to be.
If you've seen my prior posts, you may know I recently bought a 1996 early-build 996 Aero-kit car with only 17K miles. I absolutely love it, and I've taken it on a number of extremely fun drives with track buddies, local car geeks, etc. It's absolutely stunning and so much fun that the price seems insanely low. I originally thought I might flip it on Bring-a-Trailer, but now I expect to keep that car a long time. It's all the look of a first-gen GT3, with a great sound and a feel of a vintage Porsche at this point.
In that very fun 1999, I went on a spirited drive with a couple buddies in a 2021 "718" Cayman GT4 and a 2016 "981" Cayman GT4. I test drove them all and loved them all, but the 2016 manual GT4 981 version absolutely captivated me. I came home knowing I still had much want for a "real" GT car, even though my GT3 look-alike from 1999 is probably a better deal on a dollar-per s'mile ratio.
So I looked at GT4s briefly, but realized I had done my time (9 years) with my Cayman S previously, and basically spent tons of money to turn it into a GT4-adjacent car. I concluded that a GT4 wouldn't scratch the itch quite enough, and why repeat the Cayman experience?
So then I went to the Porsche site and spec'd myself a 2022 911 GT3 in Python Green with a 6-speed manual and the more comfy seats (I don't need buckets for my purposes, which includes long drives with my wife in the side seat). Speaking of my wife, she's the best. She saw me spec-ing the car and asked about it... she hasn't ever forgiven me for selling the Red 930 Turbo, but she looked at the GT3 and said: "ooooh, you should get one of THOSE". Um... OK, honey. So I called the local dealer and discussed timing and price. "December at best, probably 2023... and we are taking $70K over MSRP on these very hard-to-get cars". I thanked him for his time and tried not to choke on my ironic tone. I didn't see myself paying $250K for a car that could find itself being worth $120K at some point. I may look dumb, but I'm not that dense.
I mentioned my predicament to my friend Rick, who suggested I call our mutual friend Jonathan Hull at Merit Partners in Atlanta (these guys are amazing). I didn't need bucket seats, PCCB, Chrono, or anything crazy. Just a good 991 or 992 GT3 driver with manual. He suggested this car, which was enthusiast owned in CA and although it had high miles, it was in great condition. I told him I don't care about miles since I'm not a collector, per se, and I'm gonna drive it. And of course, I've seen all the accolades this car has gotten through the years and I have driven one before, so I know exactly just how wildly engaging it is to drive.
Engaging isn't strong enough a word: intoxicating maybe, or "exhilaratingest". And although I always like colorful GT cars, this combo of GT Silver Metallic, with silver wheels and basic red calipers just spoke "classic" to me. Anyway, the dealer had the car for 4 months, so we came to a very interesting price, which made me feel like we rolled the clock back a couple years.
I finished the negotiations, via phone, on Valentine's Day while on a hike with my wife, who then said "Happy Valentine's Day". Damn, and I didn't even get her flowers.
This car, alongside my 996 Aero, may actually present me with my "last Porsche". I expect to keep them both for a long, long time. But then again... never say never.
After a few weeks of getting her PPF'd and shipped to CA, she landed in my garage and I immediately took it to the local DMV. My initial 30 minute drive to the DMV and back home confirmed all the superlatives heaped upon this car. It’s a beast. And that wing!!!
And, when parked next to the 996, the sibling from 20 years prior, you gotta love the unswerving Porsche design ethos.
Here’s a little ride along video on my next initial outing. A couple runs to 8000 rpm or so. This thing is SCARY fast. And I’ve lived with a McLaren MP4-12C for 7 years now.
Don't get me wrong: the McLaren MP4-12C is faster (objectively 0-100 in 5.9 seconds vs the GT3 at 7.7 seconds). But the 12C almost does it in a sneaky way... it is so fast and so capable that you barely have time to understand what just happened. But the WAY the GT3 builds up with such force and bravado is hard to explain.
You think 4000 - 6000 RPM is fun and sounds great, but then it does this otherworldly shriek and kicks you in the back and runs to 7500 rpm and then it changes sound again as it peaks over 7500 to 8500 (As high as I've gone). And it feels a bit less grippy while it does it. Any bumps and road irregularities are immediately transferred to your butt-o-mometer. It is connected to the road but not in any artificial way. It communicates like all Porsches do and the need to pay attention to the gear you're in makes it more engaging as you rip through the gears, compared to a pdk or to the wonderfully smooth 12C paddle-shifter. Don't get me wrong, I LOVE my 12C. But I fully "groc" why so many enthusiasts prize the 991.2 GT3 manual experience. When you're driving it, YOU are driving it, not driving in it. I love it.
Anyone who knows me well, knows that my first Porsche was a 1985 turbo look cabriolet. Never should’ve sold the car. My second Porsche was a 1999 ocean blue 996 with factory aero kit. Loved that car and drove it for many, many miles over a number of years. I talked about it in my old blog post called “A Not-So Short History of My Car Obsession”, which is now a bit dated. But that car still calls to me.
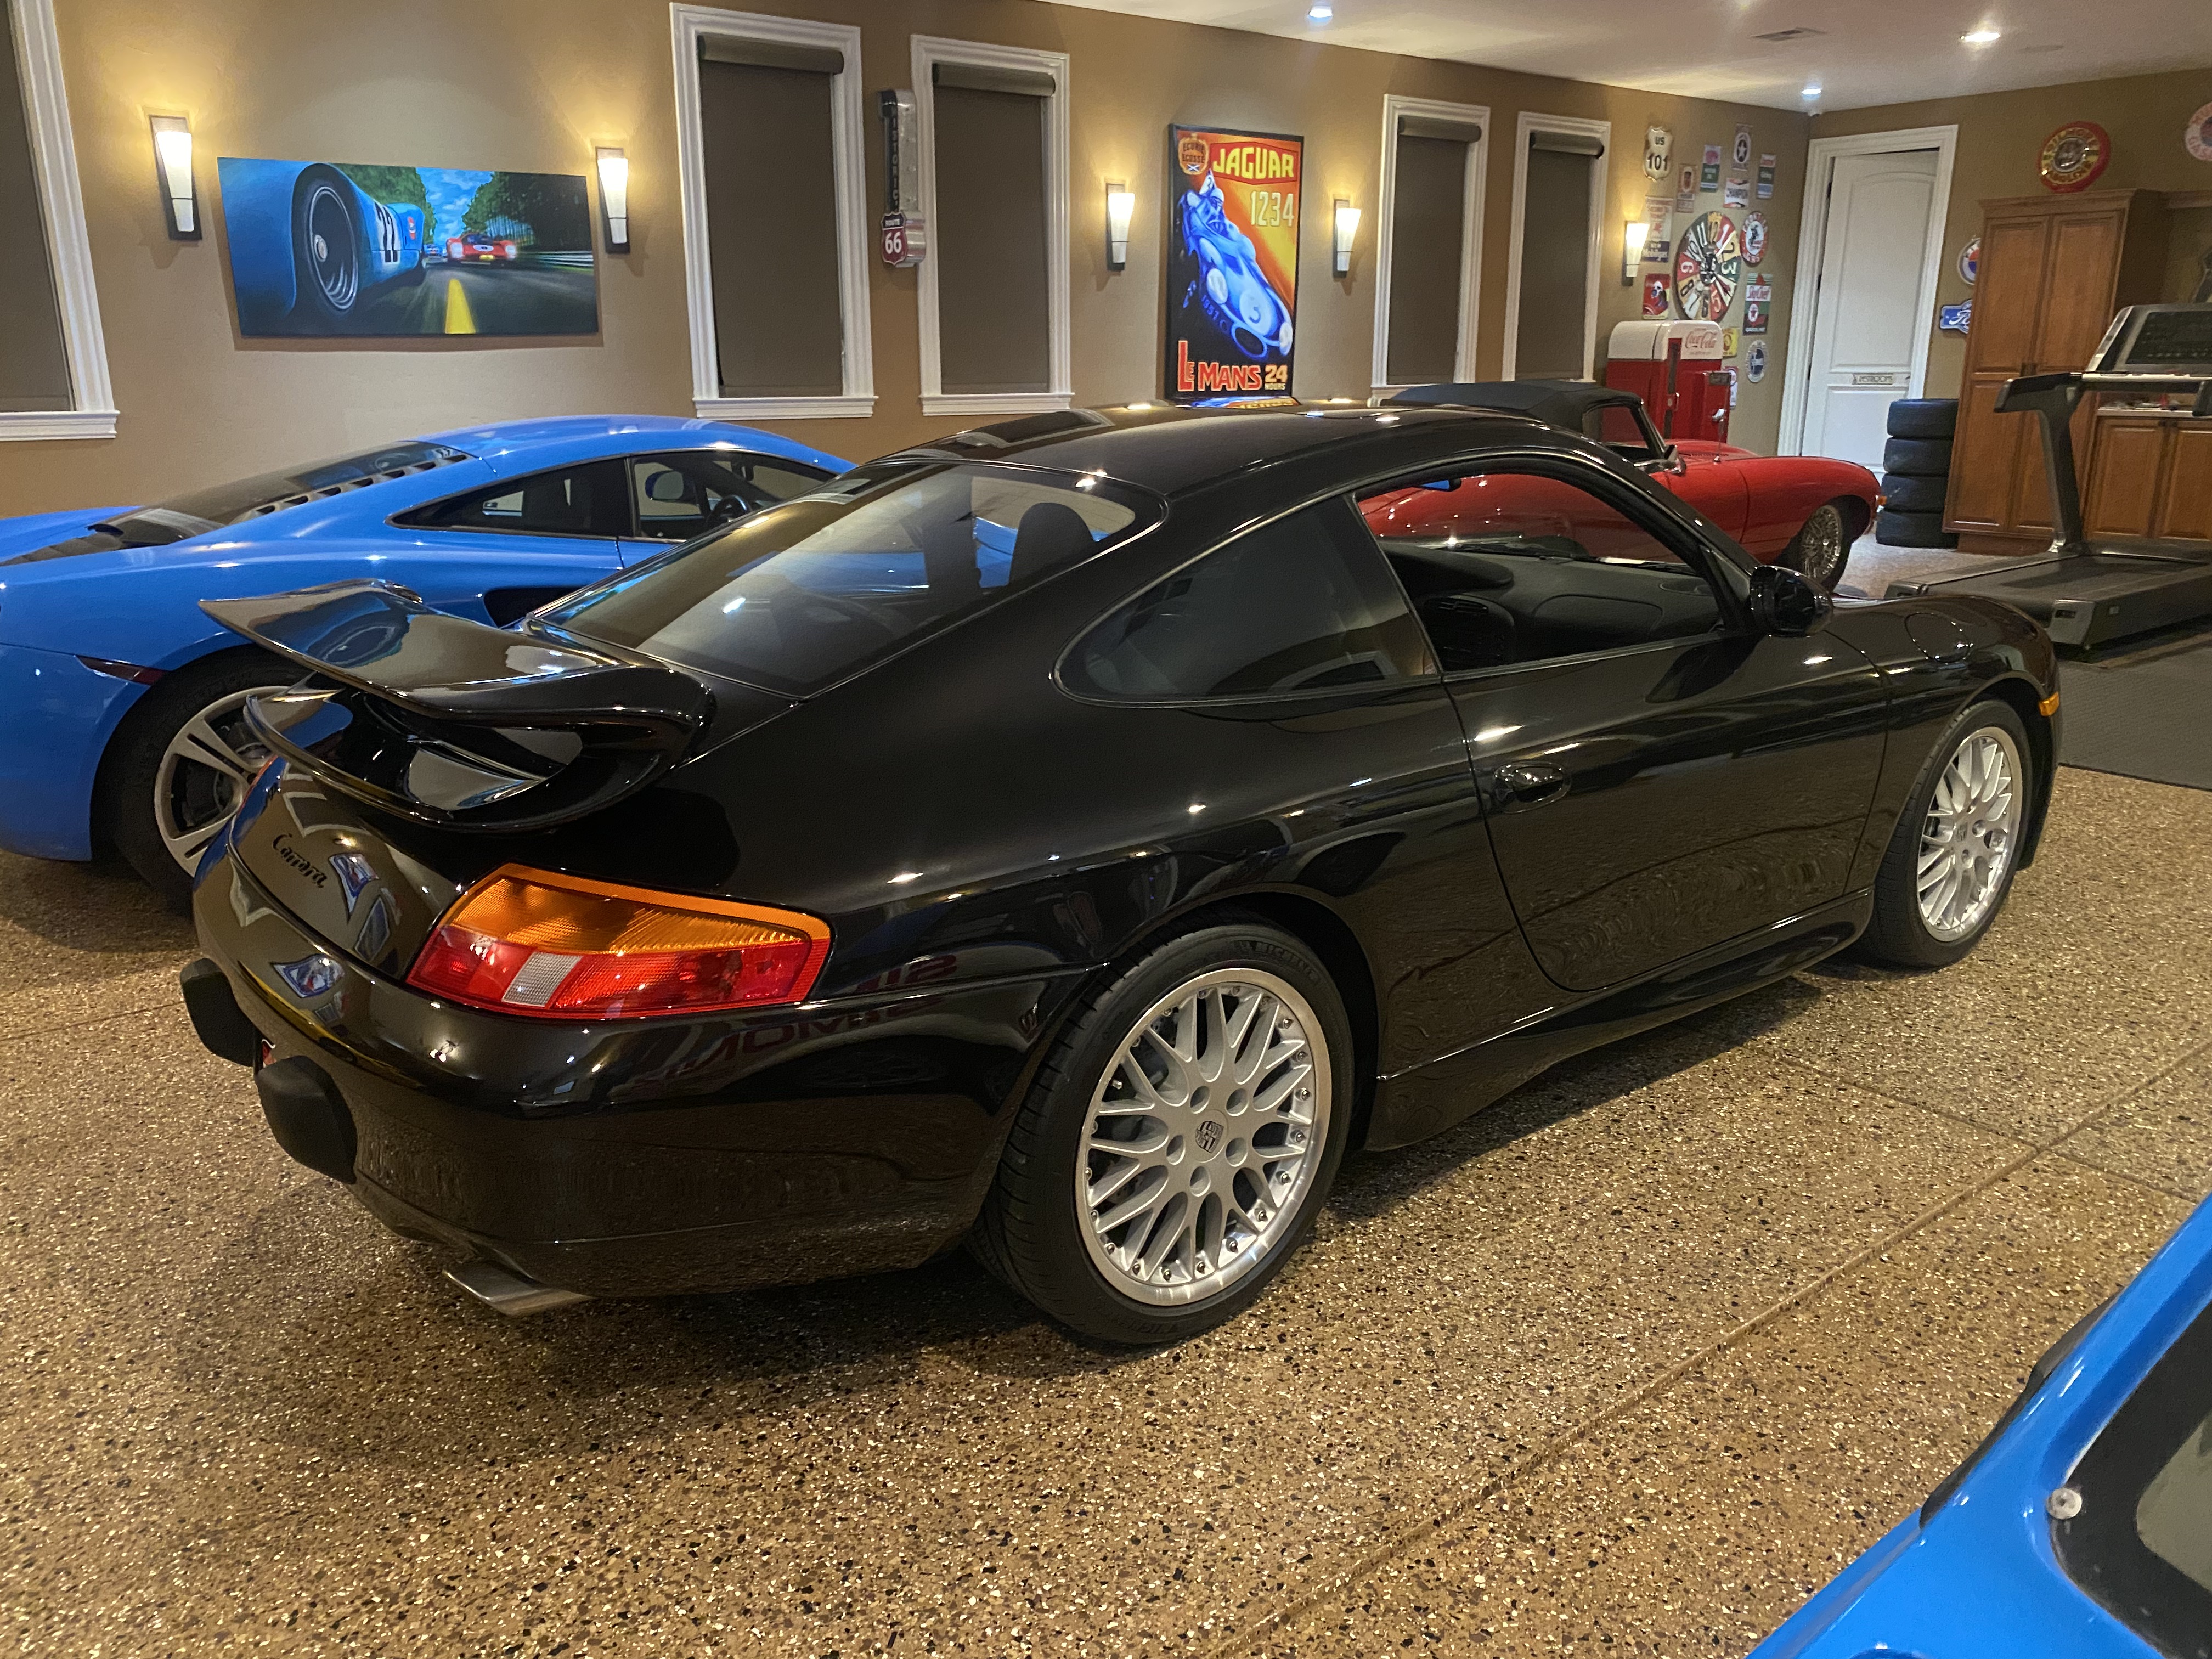
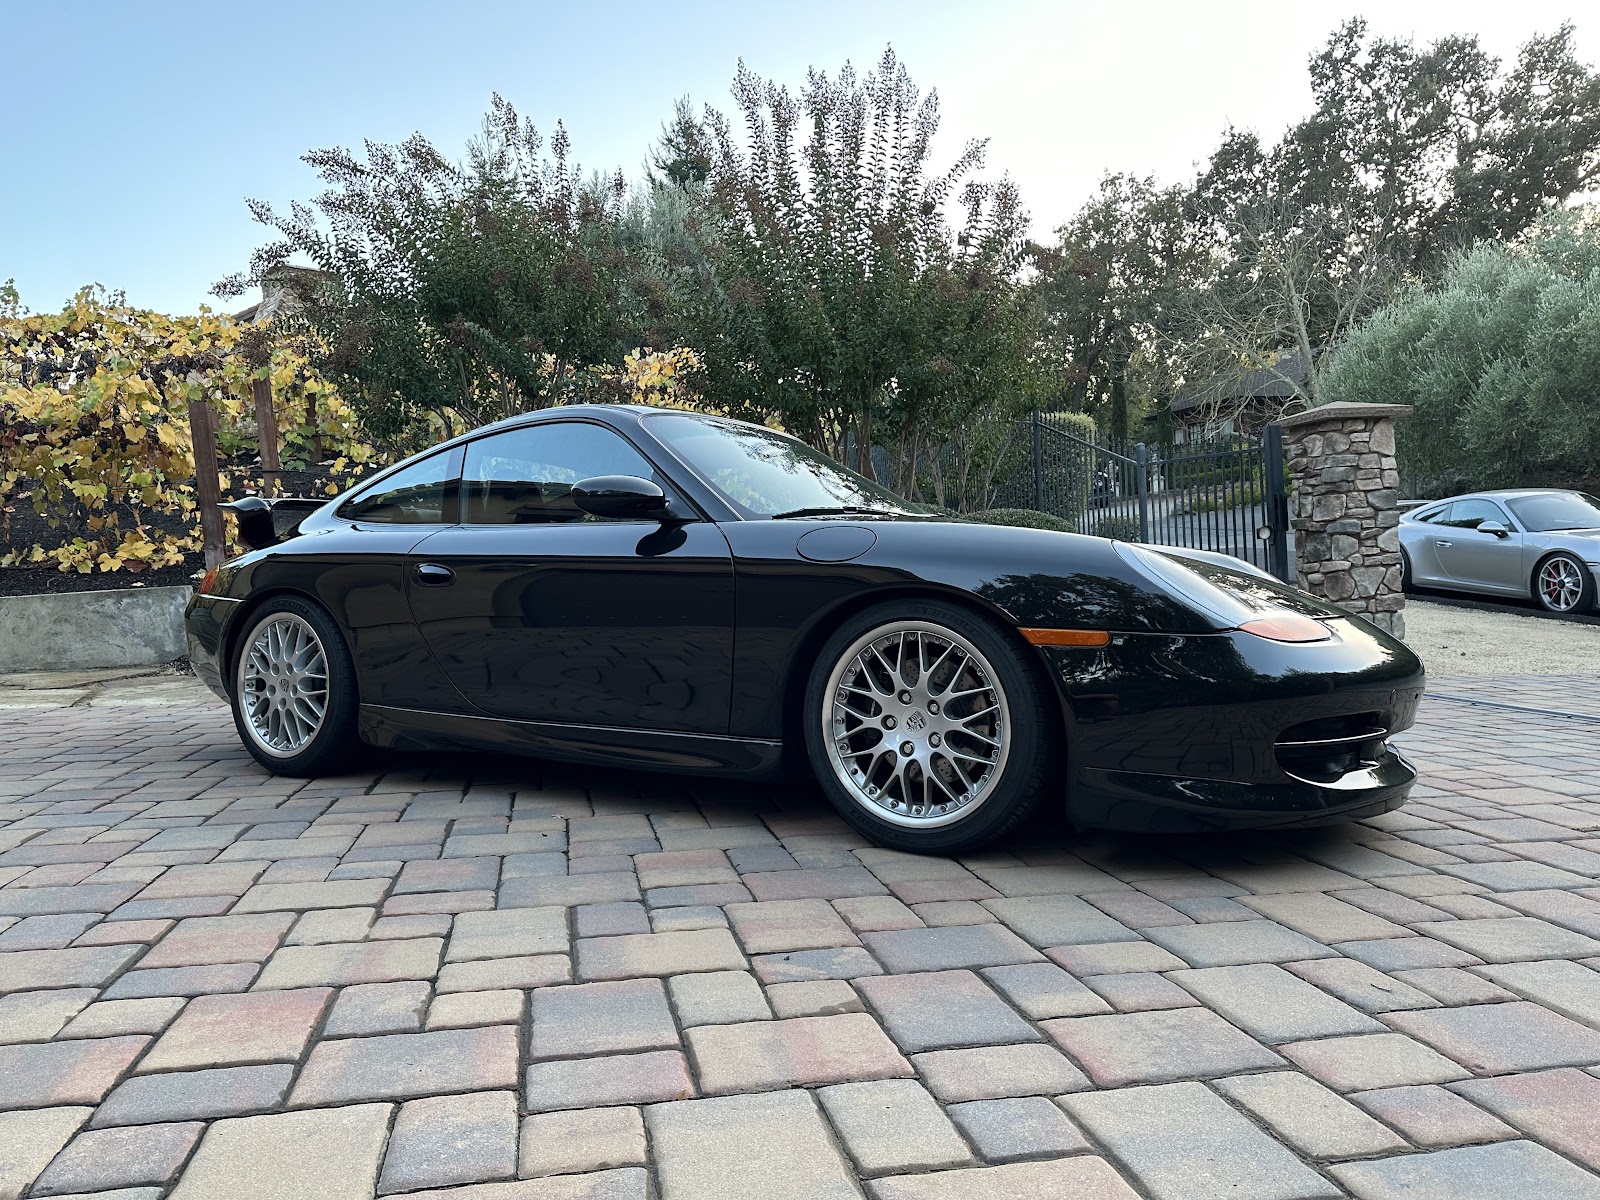
I’ve owned many cars since I sold it, and have driven all the newer stuff without feeling the need to own many of the more upscale Porsche offerings. I came really close last summer to buying something brand new from Porsche. But it didn’t excite me enough. Then I got an opportunity to re-invite what feels like an old friend back into my home. I found this (below) somewhat rare, early VIN 996 with Factory Aero Kit, 6-speed, factory Sport design wheels with just 17,000 miles on it (below). Not blue, but they’re hard to find. Old friends are the best friends, and this black 996 felt familiar, so I bought it from out of state, shipped it, and brought it into the garage in August, just as the 996-generation 911 car valuations started to rally.
I couldn’t be happier. For those who know the 996 story, these early build cars were built alongside the 993s at the end of their production. It actually has a 993 VIN. The early cars had a better IMS bearing, different interior finishes, no drive-by-wire, etc. I bought it thinking I’d flip it on Bring-a-Trailer but you don’t do that to an old friend. It has a new clutch, upgraded IMS, new rear main seal, new brakes, and zero over-revs. Only 17,000 miles! One owner!! A true unicorn.
My only plan is to lower it like my old one. I won’t drive it much, and I’ll probably someday sell it for far more than what I paid… some day. But for now, there’s finally a P car back in the garage after I sold three of them in the last couple of years.
Welcome home, old friend !
The color is Black Pearl metallic. Cool color but not as dramatic as my old blue one. If I ever find a blue one, I'll buy it. But I haven't seen one for sale in years with Aero.
Here is the option code sticker (kind of the holy grail of options for many. the only thing missing to be even better would be 030: sports suspension 10MM lower or maybe the hollow-spoke wheels):
XAA: Factory Aero Kit XRB: Sport Classic 2-piece wheels 220: Limited Slip Diff 222: Traction control ASR 424: CD compartment (woohoo! 1999!) 437 and 438: 8- way elec seat, left and right 513 and 586: Lumbar 4-way, both seats 537: seat memory 688: CD radio Becker Porsche 936: Leather rear seats 983: Leather front seats
Here is a summary of the differences of teh early 1999s vs teh updated 2000 911s, that one Porsche enthusiast posted in a 1999 911 BaT auction
*Manual cable operated frunk and engine lid releases (versus electric controls that die along with a with dead battery precluding [most ironically] battery access) [Note: some MY2000 retain manual operation].
*“Buffalo Hyde” dash material that is elegantly pebbled and matte, and far more attractive (and less distracting) than the gauche, “shiny” & highly reflective pleather (plastic) dash materials MY2000+.
*“Granite” interior accent material that is “color thru” and was shared with Rolls Royces of the same period. Again much more matte and eminently more durable than the ubiquitous “soft touch” rubberized plastics that followed MY2000+.
*Amber lensed head and tail lights from 11/97-08/98 build dates; these are a gorgeous aesthetic touch paired with almost any standard color offered at the time; especially the darker shades (C2 only).
*Less sound deadening and insulation materials that raises the glorious engine note, and lowers the chassis weight, versus MY2000+.
*Connolly Hyde wrapped 993 steering wheel was standard, which was an elegant, vintage touch (and lovingly familiar to the “Luftekhult”).
*Early amber lensed MY1999 examples (11/97-08/98) were manufactured by hand, in sequence with the MY98 993, on the legacy 993 assembly line. Whether perceived or real, many collectors believe this graced the original Early MY1999 with a tangibly increased build quality (C2 only).
*Robust MY1999 DUAL ROW IMS BEARING, versus multifarious MY2000+ M96/97 dismantler-bound iterations all tragically with less than half the bearing capacity as the 1999 original.
Gotta love the bronze in the metallic black.
I then had the car PPF wrapped on the front end and had the suspension updated and lowered a tad. The old shocks were a bit worn from age, but not mileage. I had the H&R coilover street kit added. I kept the old springs and bump stops of I ever want to go back to stock. But I can safely say I like this setup a ton. The car feels less floaty in fast corners. Better stance, too. Now I just need to decide if I want to push the tire profile out a bit with 7mm spacers.
Also had the mufflers changed to a 996 stage one muffler. Just a tad more growl, but nothing crazy. Sweet sound at all rpm levels.
I LOVE this car. For those looking for the most reasonable way to get into a 911, the 996 is a great option.
I've helped a number of people replace their existing stock rotors with Girodisc 2-piece rotors. I've used them on three different cars of mine. Great for track and street, they last. long time and provide a bit of extra surface area for better brake performance. When. your Girodisc rotors later wear out, you can replace the rotor disc with a new one, keeping the rotor hat. That makes the brake rotor replacement a bit cheaper. Here is a video showing how to do the rebuild / replacement, in. this case on my 2018 Mustang Shelby GT350R: